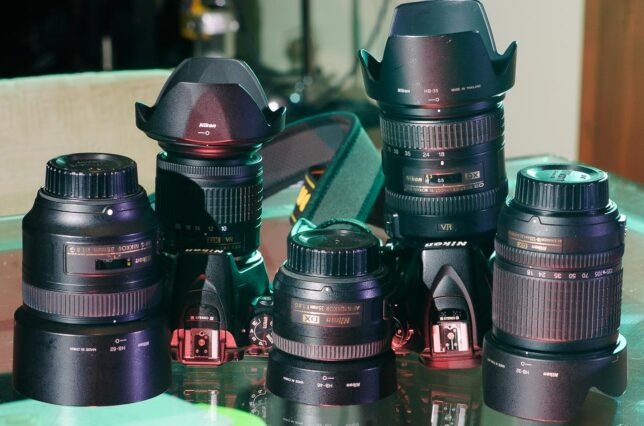
There are so many lenses for sale these days, from the $16,296.95 Nikon AF-S 800mm f/5.6 FL ED VR superlens, all the way down to a lens one of my students showed off recently, a camera body cap which holds the lens taken from a disposable film camera, on sale for $19.99.
The Lumix 14mm f/2.5 “pancake lens” is shown on my well-used Lumix GH2.
One lens I’ve kept my eye on for nearly a year since I got ahold of a second-hand Lumix GH2 is a so-called “pancake lens,” so named due to its flatness, a Lumix 14mm f/2.5.
I have several lenses in this class, all small and lightweight, so I watched, but didn’t buy, this lens until a Black Friday sale offered it for less than $100, so I finally relented.
This 14mm fits on a Micro 4/3 camera, and is a standard wide angle.
It weighs less than two ounces. According to random Internet sources, that is the weight of a tennis ball, two slices of bread, two AA batteries, 50 jelly beans, and so on.
The Lumix 14mm f/2.5 stands in front of my other pancake lens, the Fujifilm 18mm f/2.0. Because of different sensor sizes between Fuji’s APS-C and Lumix’ Micro 4/3 means the lenses provide a very similar angle of view.
The lens is so small on the camera, I can’t really get my usual (and correct) left-hand-under grip, which is okay, since there is only one control, a focus ring, on the lens anyway. I tried it out, and found it was very awkward to try to manually focus it.
I threw it over my shoulder for a couple of dog walks, and the photos I made with it look pretty good. They are sharp, especially at the largest aperture, f/2.5. (For what it’s worth, almost all lenses are “sharp” at f/11, so being sharp “wide open” matters.)
Maple leaves in the front yard show off the 14mm’s angle of view, sharpness, and subject separation.
I am not a collector. In fact, I honestly believe that if you don’t use something, you should think about getting rid of it. At least one friend of mine gives his older cameras and lenses to his kids and grandkids when he is done with them.
So what will be my prime focus (so to speak) while using this lens? I’d like to throw it in as a wild card, something I might carry as casually as we carry our phones, going to it when I want to be more spontaneous. I certainly have cameras and lenses that accomplish that, but all at a cost, my achy-breaky shoulders. Any time I can add capability while lightening my load, my body and my photography both win.
The Lumix 14mm f/2.5 is shown with some pennies for scale.
For a long time, Sony was mostly known for their consumer electronics, like the Walkman, the Discman, DVD and MiniDisc players, televisions and more. In fact, my first television was a 13-inch Sony Trinitron.
The biggest news in photography in recent weeks has been Sony’s announcement of their release of the Sony A9 III, a $6000 mirrorless camera that is equipped with the first-ever global shutter.
Do a web search for “why is global shutter a big deal?” and you will find no shortage of articles and videos explaining why. At the top of all these lists are “rolling shutter” and “flash sync speed.”
As I read and watched these items this week, I kept coming back to this: I know what these problems are, but when do I experience them? The answer kept coming back again and again: never.
So what are the possibilities? Am I somehow divorced from the technology because of my age and experience? Am I cynical about endless technological developments as needless, pointless corporate money grabs? Am I somehow missing the point?
It’s not easy to write off my answers, since I make pictures for a living, sometimes thousands in a week, and I really don’t run into these problems.
Last week another photographer, a Sony shooter, echoed my sentiment: what does global shutter do for us? Are these actual problems that need to be solved, or is this just another technology to buy to “keep up with the Joneses?”
Let me also say that I don’t want to be that old guy shouting, “Back in my day, all our film was ASA 25. You kids and your damn contraptions! Get off my lawn!”
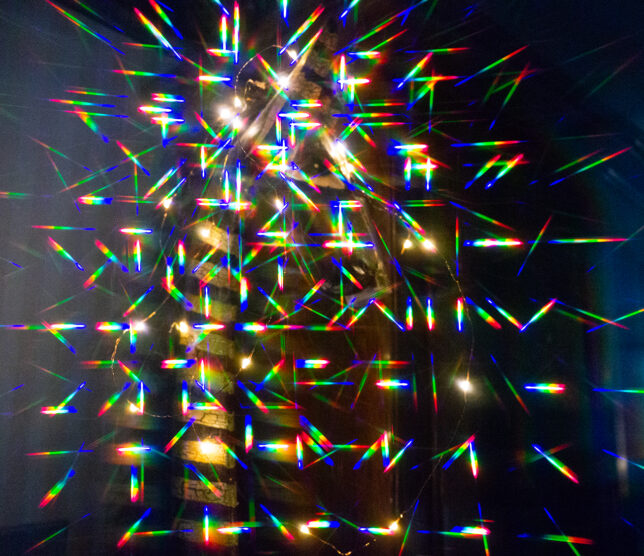
Here is a strange gift from Sony: as the sensor on my well-used Cybershot F828 started to malfunction and generated this this pattern for me, which reminds me of the tesseract from Intergalactic.
Okay, the final elephant in the room: video. This might be the obvious answer to the question of why global shutter is so significant. I don’t shoot a lot of video, and aside from a few people in my area who work in media relations, I don’t see a lot of “produced” video, just start-and-stop video from smartphones posted to social media.
Video in the last few years has become so self-referential, it’s hard to remain interested. There are so many videos on how good camera are at making video, but very little actual content produced from those cameras. “See what the new (brand) can do! Isn’t it amazing?”
So, is global shutter a solution in making videos? If it is, I’m not really seeing it. Maybe I’m looking in the wrong place. Do you have a video that you have produced that benefits from global shutter?
Another angle: digital camera sales have been way down as they compete with the cameras built into smartphones, even to the point that a lot of my photography students are pulling camera out of their bags that they neglected, telling me that want to learn to use it, “but I’ve mostly been shooting with my phone.”
How can they compete? The only way is to produce cameras with more features, with faster this and that, sharper this and that, cooler this and that. Global shutter is one of those things. And you can’t make cameras slower and heavier, even if you are trying to make it more affordable, because no one says, “You saved money? Cool!”
What do you think? Is this a solution to a problem, or a solution looking for a problem?
I dug through my photo junk, and this, the Cybershot F828, is the only Sony camera I own.
My Chihuahua Summer strikes a pose for my newest old lens, the Nikkor 35mm f/2.0, shot at f/2.8. As you can see, this lens has something to add to my game.
Like a majority of photographers, I have had various pieces of equipment pass through my hands. Many of them were great, while many of them, like the Nikon D1 or the Nikkor 43-86mm, were absolute duds.
I especially love lenses.
I had a pretty standard kit coming up on the newspaper scene in the 1980s. In fact, most of us had this setup:
Two or three cameras, for me, usually the Nikon FM2 with a motor drive, along with the following lenses: the Nikkor 24mm f/2.0 AI-S, the Nikkor 35mm f/2.0 AI-S, the Nikkor 105mm f/1.8 AI-S, the Nikkor 180mm f/2.8 ED-IF, and the Nikkor 300mm f/2.8 ED-IF.
I’m always surprised at how similar Nikon’s lenses of this generation look, like this 35mm f/2.0 next to the 85mm f/2.0. One reason for this is they shared a filter size, 52mm, which Nikon touted as an advantage, so you wouldn’t have to buy more than one set of filters.
As the years went by, I found bargains on other lenses, like the Nikkor 400mm f/3.5 ED-IF, the Nikkor 85mm f/2.0 AI-S, the Nikkor 25-50mm f/4 AI, several 28mm and 135mm lenses, and three different 20mm lenses.
Earlier in my career, I bought a Sigma Zoom 28-80mm f/3.5-4.5, back in the day when Sigma was a very cheap (in all respects) lens. I sold it within about three months, since I never made a sharp image with it.
The most disappointing lens of this era was the Nikkor 25-50mm f/4. I had such high hopes for this rare, well-made Nikkor lens, but it was hard to focus because the focus throw (how far you need to twist the focus ring) was so long. It was okay at 25mm, but nobody loves a heavy, huge 50mm f/4 lens.
The front elements of the 35mm and the 85mm have similar multi-coating that gives the purple-green appearance.
I gradually traded or all my 1980s-era Nikkor lenses for more modern lenses, mostly zooms, but I still missed some of my favorites, and recently picked another one up from a seller on Ebay, a 35mm f/2.0 of 1980’s vintage. I missed this lens after I sold it because I saw it’s potential, but didn’t take advantage of it when I had it.
The 35mm lens is sometimes regarded as a “normal” lens on 35mm-sized imaging sensors, slightly wider than the ever-present 50mm, letting photographers build a pleasing narrative without the distraction of the foreshortening that wider lenses can create.
I am also finding fewer and fewer mentions or reviews of lenses like these, and the photographic historian in me wants to remember and preserve the amazing images made by thousands of photojournalists across the globe made with lenses like these.
So, as a short review, the Nikkor 35mm f/2.0 lens is beautifully made, a pleasure to use, gives sharp, detailed images, and has pleasant selective focus with good bokeh.
So there is another lens in my bag of tricks, which goes well with my rare skill in that same bag of tricks: that I can still focus a manual-focus lens.
The Nikkor 35mm f/2.0 lens sits mounted on my Nikon D3. It’s a great combination.
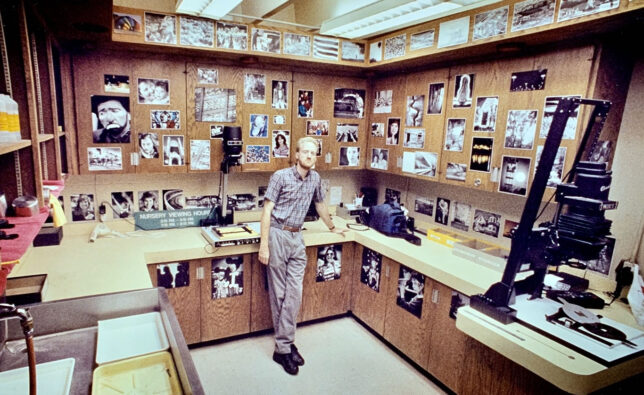
This is a frame of the darkroom I worked in for a couple of years at The Shawnee News-Star. You can see the Ektamatic film processor near the bottom of the frame with its stainless steel feed tray. On the pegboard in the background are film developers DK-50, D-76, Microdol-X and Dektol. To the right are Diafine, Accufine, and Ektaflo stop bath.
There are a lot of terms tossed around in the digital photography scene. One of them is “in post.” It refers to changing or fixing an image in the computer or other device in post-processing using software applications.
My readers know that I teach photography at the Pontotoc Technology Center, and in a recent class, someone asked me, “What was post-processing like in the era before laptops and Photoshop?”
The answers honestly seemed to surprise him, both because it was surprisingly complex, and because I could recall it in such detail.
Films: the post-processing routine is determined first by what film we chose, and how we planned to use it. For most of my film-era newspaper work, I shot black-and-white film, with only the occasional “color project.” There were a dozen or more choices, but by the time I came to Ada, I had settled into Kodak’s T-Max film system, using mostly Kodak T-Max 400 and T-Max P3200 films.
One trick we all used at one time or another was called pushing. It worked by deliberately underexposing film, with the intention of allowing you to shoot at higher-than-normal ISO ratings for low-light situations, then increasing development times to try to force more sensitivity out of the film.
Push-processing, as it was known, was not always pretty, but it let us shoot those football games at small schools with very few lights without having to resort to direct flash.
Developers: There were a lot of film developers for black-and-white film that we all tinkered with over the years. I got pretty good at using the right developer for the job. Names such as Microdol-X, D-76, and Accufine have mostly passed into history, with the main survivor being HC-110, a Kodak product we all liked because you could use it in all kinds of different dilutions and temperatures to customize your development processs. The oddest film developer I used was Diafine, a two-part “compensating” developer that was easy to use and allowed push-processing of films like Kodak Tri-X with little effort: three minutes in Diafine A, three minutes in Diafine B, fix, wash, dry, and you’re done.
Color chemicals didn’t offer much choice because of the way their dyes worked, so it required more complex planning.
Papers: After we processed our films, it was time to print. Most of the time for black-and-white printing, I used papers that used two different emulsions (the light-sensitive substances), which allowed us to use filters to control the amount of contrast in a print. Kodak called these papers “Polycontrast”, and Ilford’s brand name was “Multigrade,” but they both worked the same. Papers with only one emulsion were known as “graded” papers, with a grade 1 paper being very low contrast , and grade 5 being very high contrast.
Enlargers: There were three basic kinds of enlargers I used in my film career: condenser, diffusion, and diffusion with a color head. Condenser enlargers made sharper prints, but emphasized film grain, while diffusion enlargers made smoother, less-sharp prints that help hide the “grain” in a really rough image.
Print development: We could take one more bite from the apple when we made prints, including dodging and burning, both of which are featured in today’s Photoshop and Lightroom software suites, as well as controlling the development of the prints themselves.
For much of my career, as it was for many like me at newspapers across the globe, I used an Ektamatic processor, which used activator and stabilizer, creating a “newsroom ready” print in about eight seconds. Ektamatic SC paper prints were designed to be camera-ready for a day or two, and would then start to yellow. Photographers and editors hated them because they smelled like vinegar, but it beat waiting 10 minutes or more for a finished glossy print.
It’s amazing that photography has progressed so much in just 30 or so years, but also amazing that we got so much good photography done back then.
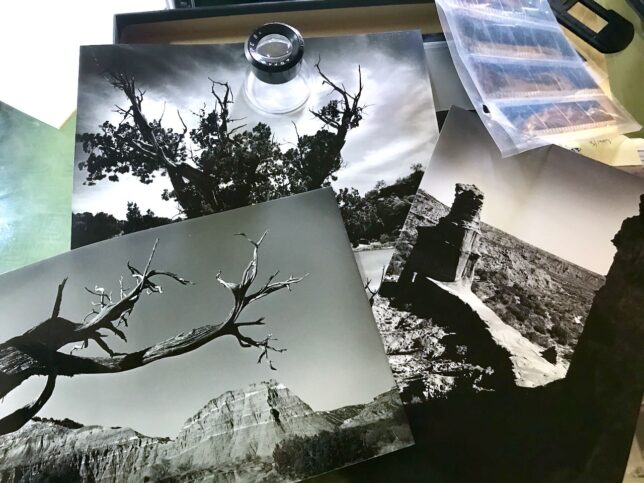
I found a box marked “News slicks March and April 1993” in my office and dumped out the contents. The prints are yellowed with age, but still very usable. They also carry the unmistakable vinegar-smell of Ektamatic prints or the era.
I hope everyone had a great fall break week. I took advantage of the slight slowdown in my work to take a trip out west, my first since before my wife died. Many of the spots and attractions reminded me of her, but not at all bitterly; I was reminded of all the great times we had.
The trip was built around a visit to Las Vegas with my sister Nicole and cousin Lori, and their husbands Tracey and Bill. Nicole always wanted to see Barry Manilow in concert, and I thought it sounded like a lot of fun, which it was.
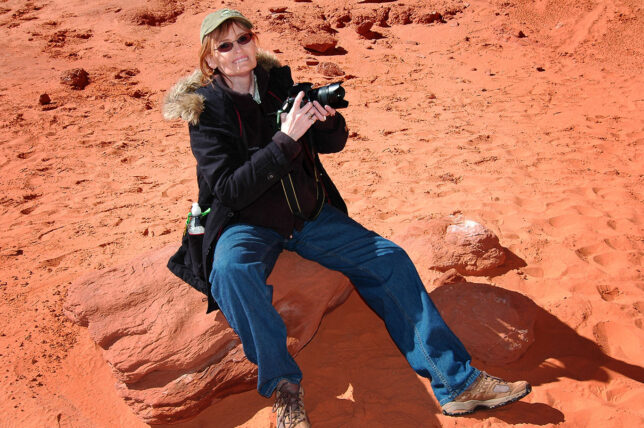
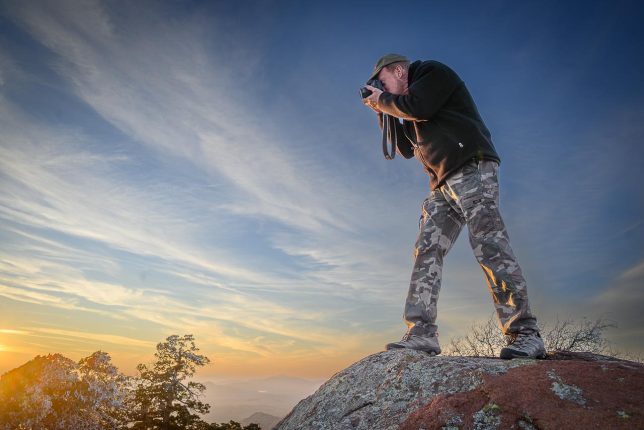
Scott holds a camera at the Boynton Canyon trail head near Sedona, Arizona.
Earlier in the week, I met and hiked with long-time friend Scott AndersEn, who wanted to hike a trail near Sedona, Arizona that neither of us had ever seen. It was a great trail.
Scott has been making short videos for social media called, “Thoughts from the Trail.” On this occasion, he invited me to be his guest speaker from the trail, so I happily contributed what I hope was wisdom.
The topic for the morning on the trail was “The Creative Process.”
“It’s a process I endeavor to master every day,” I posited.
“The creative process is always with you,” I added, “and the most important thing is: don’t be afraid of the creative process. There is a way to keep the creative process fresh, and that’s by setting aside the things you are afraid of.”
Scott then recorded the two of us in a Q&A moment.
“What are some of the ways you inspire yourself and get your juices flowing so that you can get the creative process started?” Scott asked.
“I like to set the technology aside,” I answered. “I especially like to set television and music aside, and let it be quiet. I often get that from walking my dogs. So I just switch modes, getting away from the laptop, getting away from the phone, and just being more organic. You know what that also includes? Pen or pencil and paper.”
We had an amazing hike, and at the end back at the cars, he made us peanut butter and jelly sandwiches.
So, what helps YOU with the creative process? I would love to hear.
Scott made this image of me at the Boynton Canyon trail head in the Coconino National Forest west of Sedona, Arizona.
A photographer friend and I were talking recently about how and why we use filters on the lenses of our cameras. The discussion centered around clear “lens protector” filters, but in that same group of filters are “UV haze” filters, and “skylight” filters.
I am not a collector by nature, but photographic filters seem to find their way to me. Many of these filters came from camera bags that were given to me or sold in estate and garage sales in “grab bag” fashion.
They all do essentially the same thing to your images: nothing. Many photographers use them to keep rain, smoke, dust, and their own clumsy finger off the front elements of their lenses.
In the film era, the thinking was that ultraviolet light in the atmosphere would be a problem because it would contaminate our images. The answer was the UV (ultra-violet) filter, sometimes with the word “haze” added because it would supposedly reduce the appearance of haze in the distance, since haze tends to be in the blue to ultra-violet portion of the spectrum. If you look closely, you will see this filter is very faintly yellow.
I have a few more than a few UV-haze and skylight filters in my collections. They seem to accumulate more than anything else.
Likewise, a lot of film photographers, including me, used a “skylight” filter on their lenses, since magazines like Modern Photography and Popular Photography told us to. This filter appears very faintly pink if you look through it.
Those filters were intended for use primarily for color photography, but we almost always left them on our lenses when we shot in black-and-white. The exposure penalty is negligible, as is any noticeable tonal rendition.
Other filters for color film photography included color correction filters for use with daylight-balanced film in incandescent or fluorescent light, or to fine-tune color balance in a studio setting.
Here are three “graduated” filters, part of a kit that screws onto the front of a lens, letting you drop in filters like this, and rotate them to change where to effect is strongest.
A popular filter paradigm in the late-1970s was the “graduated neutral density filter,” so named because they gradually got lighter or darker across the image area. You could get these filters in colors, too, so your image would be unchanged at the bottom of a frame, for example, and blue or brown or red toward the top of the frame. Watch the intro the the movie Top Gun, the jets on the carrier scenes, and you will see that they used exactly that to created those sunsetty-looking shots.
Here is the kind of effect you can expect to get if you use graduated filters.
Like a lot of trends, this kind of filter system experienced a flash of popularity which waned quickly, but stuck around at a low level, and once in a while you can see these filters in use, especially with nature photographers.
Here is a spectrum of filters for black-and-white films. Filters like these have mostly been orphaned by software like Photoshop, and “film look” in-camera settings.
My favorite kinds of photographic filters are for black-and-white photography, although I didn’t get to use them very often. Their impacts on images could be dramatic. Red and orange filters would block blues and greens, creating deep, dark skies and cutting haze, while yellow and green filters tended to help black-and-white films respond more realistically. Blue filters, thought seldom used, darkened red and yellow areas, and lightened blues.
I only made a handful of really successful black-and-white medium-format images in my day. This is probably my favorite. It depicts a clearing summer thunderstorm over the Pecos River in northern New Mexico. I shot it with my Fujifilm GW670 III using Kodak Verichrome Pan Film, with a deep orange filter on the lens. The filter helped create the deep skies and shadows.This view from the top of the Capulin Volcano in northeastern New Mexico emphasizes the beauty of the high-desert sky. Made with my Fuji 6×7 loaded with Kodak Verichrome Pam Film, I filtered the lens with a deep orange filter.
Finally, there are polarizers, but I promise to cover those in another article.
The golden age of filters is gone, mostly because of editing software like Photoshop, which can accomplish most types of filtration effortlessly.
Easily the weirdest of the color-correction filters is the “FL-D,” meant for use with daylight-balanced film in fluorescent lighting conditions. That in itself isn’t weird. The weird part is that I see dozens of these in the hands of photographers who buy digital camera “kits”, which usually include a cheap tripod, maybe some cleaning cloths, and, for some reason, this filter, which is completely useless and obsolete in the digital age.
This is Nikon’s Nikkor 50mm f/1.8, the cheapest version of this lens. As you can see, it doesn’t say “E” or “Series E” anywhere on it, but it does say “Nikkor,” meaning it is definitely NOT a Series E lens.
I recently saw a critical comment on this blog. It was from someone named Alex who pointed out, “you miss mentioning that you’re using the 50mm ‘E’ lens.”
The problem is that not only is this untrue, but why would you bother in the first place? I’ve said it so many times, in so many ways: too many times, trying to look smart makes us look dumber.
And sure, I could school this guy about why he was wrong, with pictures and references and so on, but that never works, usually eliciting a terse reply in the area the always-popular ad hominem attack: “You’re not even a very good photographer,” or maybe, “I’ll have you know that I worked in a camera store for 75 years!”
Another guy asked me if was “being facetious” because I liked the sharpness I got from a 500mm lens. Do people even know what “facetious” means?
It also frustrates me that the photography world has to talk in marketing terms. A good example is “megapixel,” as if one megapixel was one thing. Of course it’s not. Mega means million, so a megapixel is a million pixels.
Another example is calling an entire class of cameras a name based on what it’s not: mirrorless. All that says is that it doesn’t use a mirror in the viewfinder. It’s just as true to call my car diesel-less, since it doesn’t use diesel fuel, but that doesn’t actually describe my car.
I’ve also been trying to break myself of the habit of using “Google” as a verb. Instead of “why don’t you Google it,” I’m trying to say, “do a web search for it,” the idea being that I’m going to single-handedly bring down the web’s biggest super-monopoly.
One way you can tell a Nikkor from a Nikon Series E lens is by the aperture ring, which is at the top of this image. Nikkors like this one have the “double diamond” pattern, while Series E lenses have a single-row pattern on the ring.
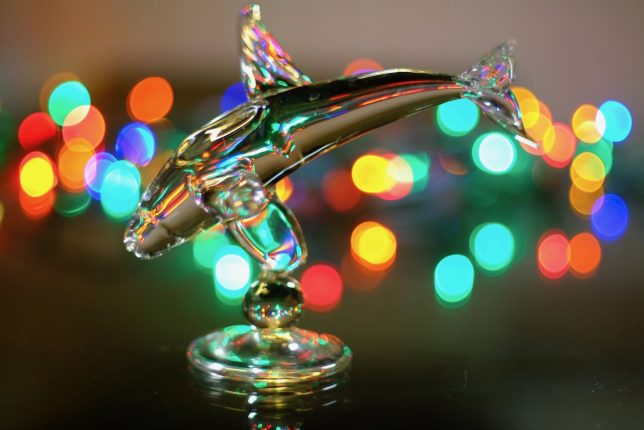
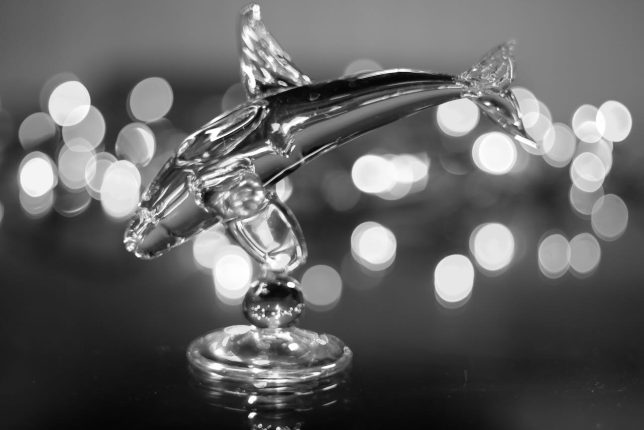
The second I heard Nikon introduced a new $2500 lens that “made great bokeh,” I stepped out into my front yard and created this “bokeh” with a $5 Minolta 58mm f/1.4 lens.
I hope my readers forgive me if I seem a little cynical about this topic: bokeh.
This week’s big photographic news is Nikon’s introduction of a new lens called “Plena,” a 135mm f/1.8 lens that promises, according to early releases, “beautiful, well-rounded bokeh,” among other things.
It is a reminder that this one word, “bokeh,” has taken photography to a place that resembles a fetish. Photographers, mostly the photographers who make a living talking about photography rather than actually being photographers, can’t shut up about “bokeh.”
They trot out terms like “bokeh balls”, “buttery bokeh”, “creamy bokeh”, “dreamy bokeh”, even “insane bokeh”, and on and on. Almost all of their photography consists of making pictures to show which lenses make better bokeh, or how to make bokeh itself, which, if you understand the term, isn’t even a real thing.
What offends me so much about this is the idea that it creates a culture of buying creativity, which anyone with a soul knows is ideologically impossible and socially poisonous.
Here is the bottom line, one the YouTubers and camera makers don’t want to hear: once you have figured out how to use selective focus and bokeh, you can put those skills into your toolbox and stop talking about them. I figured out these techniques very early in my career, and use them when I need them, ignore them when I don’t need them, and never, ever worry about what I should buy to, well, make me a better person.
Yeah, bokeh. Too easy, too overdone. And before you ask, this “bokeh” was generated using a 35-year-old Nikkor 85mm f/2.0.
A friend of mine asked me this week about how to shoot candlelight vigils. She’d been to one, and while she got some usable images, she was not able to catch any magic with her camera.
Vietnam veteran James Pippen salutes as he holds a candle during an Ada Indivisible candlelight vigil in 2017.
Photographing low light situations has always been a challenge, but it has gotten easier in the last few years as the highest ISO settings, which control how sensitive the imaging sensor is to light, have shot into the stratosphere. It is pretty common in 2023 to shoot at ISO 12,800 with surprisingly controllable noise.
Even so, photographers sometimes run into situations where we are right on the margins of imaging: kids around a Christmas tree, detectives with flashlights at crime scenes, Relay for Life lit by luminaria, bonfires, people at fireworks shows, and, of course, candlelight vigils.
Luminaries glow at Relay for Life 2014 at Ada High School Friday, May 30, 2014. For this image, I used a tripod, which allowed me to shoot with a smaller aperture while still collecting a nice balance of last evening light with candles inside luminaria.
I tend to lean on lenses with very large maximum apertures, like f/1.8 to f/1.4. The easiest way to get into lenses in this category is to look at 50mm lenses. They have been around for decades, are easy and cheap to make, are lightweight, and, most importantly, they let a lot of light into the camera.
I know a couple of very talented photographers who have even brighter (known in the biz as “faster”) lenses, like the 85mm f/1.2.
Nothing invites you to the low-light party like lenses with vary large maximum apertures. Here are two 50mm f/1.4 lenses. The 50mm class of lenses is a great place to start low light photography.
Note that not all 50mm lenses are sharp wide open. Most 50mms need to be stopped down just a squinch, maybe to f/2, but that still invites a lot of light into the camera.
Tripods are another factor, though I find they slow me down. You can park your camera on a tripod and shoot at medium ISO values and medium aperture. The only problem that presents is that if people move while the shutter is open, they can be blurred, but there are some instances in which that can actually help your image, if that’s the look you want.
A good practice session might involve going outside with a 50mm set to f/1.8 and shoot by porch light or streetlight light and experiment with how to finesse those situations. Don’t be afraid to push yourself and your camera outside your comfort zone. Failed experiments can teach us a lot.
Once in a while I’ll reach into my bag of tricks and pull out my rare and slightly mysterious Nikkor 200mm f/2.0. It is a challenging lens to use, and is big and heavy. And while I expect to delete a bigger percentage of images made with this lens, it has some very real low-light potential.
This week Fujifilm announced their newest camera in the “medium format” digital market, the GFX100 II. I am very excited by this camera, for several reasons.
Fujifilm announced their new medium format digital camera, the GFX100 II, this week. One of Fuji’s marketing taglines for this line of cameras is “More than full frame.”
Fujifilm has always been a favorite brand for me. My first single lens reflex (SLR) camera was a Fujifilm ST-605n, which I bought in the summer of 1978.
Fujifilm has been developing one of the most interesting lines of camera and lenses on the market today.
Fujifilm understands that the idea of “full frame” for digital imaging has always been a compromise, as in, “full frame” is a full frame of what? 35mm film, a format that was the most popular film size in history, but which was never the film format that resulted in the best image quality.
As a result, Fujifilm has developed two successful lines, one smaller-format, APS-C sensors, the other a larger format, in this case a 43.8mm×32.9mm sensor, about the size of a Post-It note.
The specs on this new camera include the ability to shoot 8K video, but in a world of 100-million-dollar action movies, more video resolution might be a selling point, but as it increases by leaps, my interest plunges by leaps. Imagine, for example, how much better your videos might be if you went to filmmaking school with the money you’d use to buy all the cameras you think you need to make films.
At the heart of any digital camera, from your smartphone to the biggest, most-expensive digital camera, is the imaging sensor. This is one I took out of a dead Nikon D100.
Of course new, this camera’s price is high, though not as high as cameras in this class once were. If I were constructing a camera system from the bottom up, and image quality, especially in terms of maximum resolution for high-end photographic applications like portraiture, advertising, product and food, or fine art are concerned, this camera might be the cornerstone of that system.
But honestly, how many pictures made with incredibly powerful digital cameras end up on social media and nowhere else? Does it make sense to make images at resolutions like 12,000 x 9000 pixels, only to have it instantly reduced to 2048 × 1371 by Facebook? And does it make sense to spend $7000 so your friends will ooo and ahh at you on Instagram?
In a way, this feels like a call to photographic artists to resolve to do more – much more – with their images. Think about how much more satisfying, and long-lasting, it would be to have some of these super-resolution images printed really big and displayed in our homes, in galleries, or for sale to the public? How great would it be to spread out a dozen of your best images, all printed the size of posters, for sale on the Plaza in Santa Fe?
I have been to Santa Fe, New Mexico many times over the years, and I have always loved it’s artsiness, and have often daydreamed that someday I might like to sell my images there.
This article was originally posted in 2015, but this update reflects the fact that I recently purchased another Reflex-Nikkor 500mm f/8 lens.
The Reflex-Nikkor 500mm f/8 lens, second from the left, sits in the company of a 50mm f/1.4, an 85mm f/1.4, and a 500mm Opteka mirror lens.A young t-baller catches a fly in this image from the mid-1990s. Thanks to the characteristics of the mirror, or catadioptric, lens, the highlights in this image look like doughnuts.This is the Harlan J. Smith Telescope at the McDonald Observatory in Texas. It uses the same method of folding the optical path as the Reflex-Nikkor 500mm does.
In the late 1980s through the mid 1990s, I had a Reflex-Nikkor 500mm f/8 lens. The optical formula is known as a catadioptric, or mirror, lens. Astronomers know about this type of optic, but despite being a relatively cheap way to own a long-focal-length, lightweight lens, this design has fallen very much out of vogue with photographers because of a several significant shortcomings…
The maximum aperture is small, typically around f/8, and because of the optical design is the only aperture available.
Significant vignetting – darkening at the edges, so the f/8 is only f/8 in the center of the image, and the corners are more like f/16.
The “bokeh,” or quality of the background, isn’t just ratty or ugly, it can be, in some circumstances, downright unacceptable.
This is an obvious example of the so-called “doughnut bokeh” of the Reflex-Nikkor 500mm f/8. It’s not normally this exaggerated, but I knew right where to camp, at the edge of a lake in the morning, to capture this at its best, or worst.
I found that in the years that I owned it the first time, my 500mm sat at the bottom of a bag of “extra” lenses I kept in the trunk of my car, and I seldom got it out and used it. By 1997, I had the magnificent Nikkor 400mm f/3.5 ED-IF, which combined with a teleconverter to form a 560mm that was very sharp.
However, like a lot of Nikon lenses I sold, I started missing the 500mm, so I kept tabs on them on Ebay. For a long time, they were commanding a very high price. But with the development of cheap superzoom lenses for the ever-growing mirrorless camera market, prices finally fell, so I grabbed one. I got it from a seller in Japan, and this particular one is in almost perfect condition.
The 500mm f/8 Reflex-NIKKOR sits next to its hood on my kitchen table. The hood is very shot, and mostly just serves to keep my fingers off the front element.The design of the 500mm includes a mirror that faces the back of the lens, so looking in the front of the lens shows a dark disk mounted on the front element. This configuration is responsible for the odd look of out-of-focus areas.
I put it into service the next day, and it was everything I remember: a sharp, lightweight, manual-focus lens.
The 500mm is sharp when you take care to focus it precisely, as in this image from a Latta Panthers baseball game last week. You can see a little bit of the telltale “doughnut bokeh” in the background, but it’s not a deal-breaker.
Being able to focus a lens is a dying skill, but one I personally keep alive. This lens is among the more challenging to focus because the depth-of-field is razor-thin, and the focus throw, the amount you have to turn the ring to focus, is very long. It needs to be, since long focus throws let us carefully fine tune our focus spot.
Of course, we come back to the idea that mirror lenses produce those obvious doughnut-shaped out-of-focus areas, often called, correctly so (for a change), doughnut bokeh. It can work against you, but if your backgrounds are less cluttered and darker, it’s less of an issue.
One thing that makes this 500mm better today than in the film days is that you can amp the ISO on digital cameras so you can marry the constant f/8 with a fast shutter speed.
I can’t truthfully say I recommend this lens, since there are many better options today, but buying it and using it again after all these years scratched a bit of nostalgia itch. I’m glad I got it.
Years ago I used the 500mm f/8 to make this image of two girls playing at a local school. It was a bright day and the background was quite far off and not very busy, making for a successful feature photo with this catadioptric lens.
Photography is both a fickle mistress and a moving target. One day pictures of models atop mountains are the big thing, then the next big thing is a picture of grass on your knees. Social trends have always been like this, but the speed of the webscape tends to amplify it.
This new Nikkor Z 8mm f/2.8 from Nikon is very different looking from the classic wide angles of the past, especially the very small front element.
I happen to think there is still room for the classics, and one of those is a basic wide angle lens. In fact, I talked about my favorite wide angle lens just last week.
In the middle of this conversation, a fellow photographer excitedly told me on the phone that he’d just bought a 28mm f/2.8 lens for his Nikon Z5. The Z5 has a 24mm x 36mm sensor, so 28mm is right in the middle of the standard wide angle range. He sent me a couple of photos of him unboxing it, with pictures of the lens itself.
The most obvious difference on the outside of the new Nikon lenses for their Z series mirrorless cameras is their austerity. There are few controls on these lenses, as almost all the functions are controlled by camera buttons and dials, or camera menus. It makes them look a little bland and blank, but also slick and post-modern.
I have an AF Nikkor 28mm f/2.8 of 1990s vintage. It has a bigger front element, but it’s not much of a performer.
Also oddly un-lenslike for us old timers is the design that front element very small compared to the overall size of the lens. We grew up admiring and owning lenses that sported very large front elements, and believed they were the hallmark of a great lens, and make the lens look more capable and commanding.
I expect the tiny front elements are a result of design efforts for lenses in smartphones, and the computer designs for making very small lenses translated well to photographic lenses in general.
Finally, my friend sent a photo he made within an hour of getting the lens, an image of a friendly bulldog on a sidewalk, and the image is flawless.
A bulldog eyes my photographer friend’s new 28mm lens.
A buddy of mine recently dropped and destroyed one of his favorite wide angle lenses, an AF-S Nikkor 35mm f/1.4G, which he called his “butter 35.” The nickname described the way this remarkable lens rendered out-of-focus areas.
Madi Brown tries to photograph her dog Moose during the Santa Stroll Monday night, Nov. 21, 2022 in Ada’s Wintersmith Park. Shot with my AF Nikkor 20mm f/2.8 on the Nikon D700, it shows how a wide angle lens can be used to create a sense of “being there” for the viewer, as well as an idea of the way sunstars can express brightness in a wide angle image.
It got me thinking about my own wide angle lenses over the years, how I use them, why I like them, and which ones have emerged as my favorites over the years.
In the film era, I shot a lot with the Nikkor 24mm f/2.0, which was the staple of most of us news photographers. It was one of those lenses that I literally used up and sold almost as scrap, which I think is the perfect fate for a truly great piece of artistic equipment.
This is a scan of an image I made very early in my career, shot with my Nikkor 24mm f/2.0 stopped down to about f/5.6 to create gorgeous 14-point sunstars. The effect really drove home the brilliance of the spotlights.
Also in my bag during most of my film-era photography was a Nikkor 35mm f/2.0. It was also a staple of news photography back then, serving as a more popular and versatile “normal” lens than the ubiquitous 50mm. I used it up as well.
As the digital era has matured, very wide angle lenses have taken over, made possible by computer aided design and manufacturing. An impossible-to-build lens in 1985 is in everyone’s bag by 2023. I have several that I love, including a very lightweight, very affordable 10-20mm for my Nikon APC-sensor (24x15mm) cameras.
But I am also a lover of the classics, and as larger imaging sensors (36x24mm) have made their way into my workflow, so have a couple of classic ultra-wide-angle lenses: the AF Nikkor 20mm f/2.8, and the AF 18-35mm f/3.5-4.5.
The AF Nikkor 18-35mm f/3.5-4.5 is shown on my well-used Nikon D700.
You will usually find one or the other of these classics parked on my Nikon D700, usually as my second camera at events like news conferences and football games. They are very capable. The 18-35mm is more versatile, while the 20mm is more compact, yet has a larger maximum aperture. The 20mm also has the advantage of creating very smart 14-point sunstars with its 1990s-standard seven straight aperture blades.
Oddly, the bigger 18-35mm is noticeably lighter than the 20mm, since it was produced using a plastic barrel, focus, and zoom rings, while the 20mm is all-metal.
The use of these lenses can be a bit tricky, since using a wide angle to “get it all in the frame” usually results in an image that bores the viewer. The best way to use these lenses is in creation of a narrative that leads the viewers into the scene with near-far relationships and leading lines. That means using a wide angle involves movement – up, down, looking up, looking down, crowding in and, honestly, having fun bringing new perspectives to old subjects.
If I had to nail it down, I’d say the 20mm is my very favorite wide angle lens.
The AF Nikkor 20mm f/2.8 is shown mounted on my Nikon D700. This lens with its bayonet-type hood has been mistaken on a couple of occasions for the AF Nikkor 18mm f/2.8.
Between gifts from readers and estate sale box buys, I have a nice collection of cameras. From actual antiques to digital cameras that are almost up-to-the-minute technology, it forms a timeline of photography on my selves.
The Nikon N8008 and N6006 pose in my home studio.
Two cameras that fall in the middle of all that are the late-1980s, early-1990s Nikon N8008 and N6006. These cameras were among the first to provide fully automatic everything, from shutter speeds and apertures to film winding and rewinding.
My fellow photographers and I grew up believing that manually-operated, mechanical cameras were our only safe bet, so when cameras like these came along, we were skeptical. We were especially suspicious of cameras that didn’t allow us to wind the film to the next frame or rewind the film back into the canister when we were done.
The control quad on the top left of the Nikon N8008 and N6006 are similar but not identical. The location and shape are inherited from the location of a mechanical rewind knob on earlier 35mm cameras.
It turns out were were mostly right. The tech of the late 1980s and early 1990s was transitional, and while I understand that cameras like the N8008 and the N6006 were a part of the transitions that got us where we are today, I wanted nothing to do with it. Croaked-out batteries didn’t just mean you had to guess the exposure. They meant you were done using that camera, and your film was a prisoner inside it, until you could get ahold of fresh batteries.
When handling these cameras, the thing that strikes me the most is how heavy they are. I expect this is because another issue in the transition from film to digital was the idea that plastic was “junk.” Honestly, that’s mostly right also. There have been a lot of strides in the last 30 years towards better materials, both in plastics and metal alloys.
The surfaces of both of these camera is slick and hard, offering an uncomfortable grip surface.
The main display panel on the Nikon N8008 is smallish and a little hard to see, and is very evidently a transitional phase between all-mechanical film cameras and all-electronic digital cameras.
If you put batteries in these cameras, they seem to come on and run as expected, but that experience is as clunky and awkward as a 14-year-old boy asking a girl on a date. The buttons are oddly placed, the displays are small and not very contrasty, and the sound the camera makes – kerrrrclunk-whrrrrr – as it winds the film is like an underpowered VW microbus climbing a mountain pass.
Autofocus is barely there. That is an area of development that has skyrocketed in capability over the years.
Despite all that seems wrong with cameras of this ilk, I am glad I have them in my collection. They stand as a moment in photography history.
The Nikon N8008 and N6006 are shown with an AF Nikkor 35-70mm f/3.3-4.5, a lens these cameras wore as part of a kit. Some, including me, think this lens is among the worst Nikon ever produced.